Koldwater Training Software
Training Applications for the Electrical Controls Industry

Koldwater Training Software
Training Applications for the Electrical Controls Industry
Networking is Now Possible
with our Training ApplicationsWith the addition of our Mini-Learning Management System, the possibility of installing our applications on a Server and allowing networked users to use the programs becomes a real possibility. We have done some research and we were even able to do this on a simple peer-to-peer network. An explanation of how to set up for network operation and allow data to be stored in the LMS can be downloaded by clicking here.
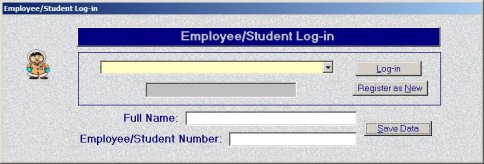
The Log-in Window includes a drop-down list box that will list all of the currently registered Students. The user will simply pick his/her name from the list. Once the name is chosen, the matching Student Number will be displayed. The User will then click the Log-in Button.
When a new student logs in he/she will need to register. The registration must include a unique Student Number.
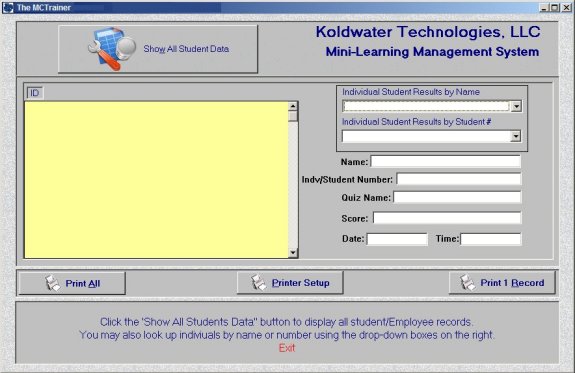
For the convienance of the Instructor/Supervisor, an interface is available to display and/or print the Student data. The data may be displayed for individuals or for the entire group. The data may also be searched by registered name or by student number.
Install the application on the server. By default the folder containing the LMS Database is writeable by all users. However, extra steps may be necessary to assure that this is actually the case. Once the applications is installed, locate the folder (C:\Program Files\KoldSoft\Application Folder) and set it to be shared. Allow all Users to read and write to the folder.
Next, open the folder and select all files and folders, with the exception of the LMS folder. Right-Click and then choose 'Properties', then select read-only. Be sure the LMS folder and its contents are set to allow all-users to read and write to the contents of the folder.
The final step is to go to the individual client machines and open the browser the network for the shared application folder. Then locate the application executable file (Example: PLCTrainer4.exe) and drag a shortcut to the client machine. When this is done the application should be accessible by multiple users at the same time.
Sharing files and folders can sometime be a bit tricky. Below is an example of how to accomplish it.
Configure your computer to share files
To share a folder on your computer so that files stored in the folder can be accessed from other computers on your home network
1.Log on to your computer as an administrator.
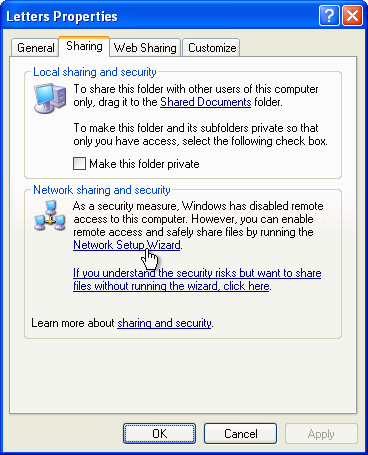
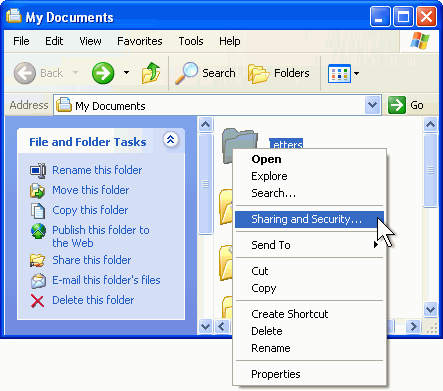
2. Right-click the folder that you want to share, and then click Sharing and Security. We found it best to share the KoldSoft folder and allow all users read/write access, then share the individual folders for the applications also allowing read/write access to all users.
3. If you see a message that reads, As a security measure, Windows has disabled remote access to this computer, click the Network Setup Wizard link. Then follow the instructions in How to set up your computer for home networking. On the File and printer sharing page of the Network Setup Wizard, be sure to select Turn on file and printer sharing. If you do not see this message, skip this step and go to step 4.
Note: If you do not see the Network Setup Wizard link or the Share this folder on the network check box, your computer probably has Simple File Sharing disabled. This is a common change made to computers used for business. In fact, it happens automatically when a computer joins an Active Directory domain.
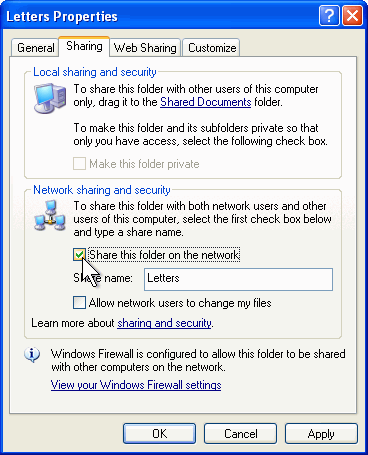
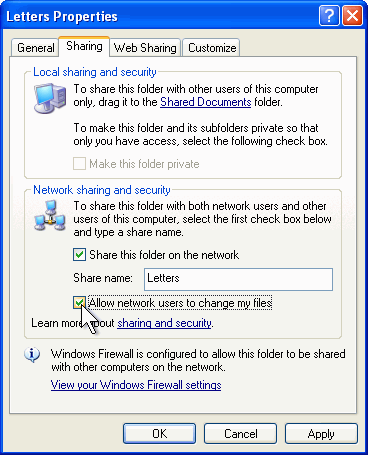
4. In the Properties dialog box, select the Share this folder on the network check box.
5. If you want to be able to edit your files from any computer on your network (instead of just being able to open them without saving any changes), select the Allow network users to change my files check box.
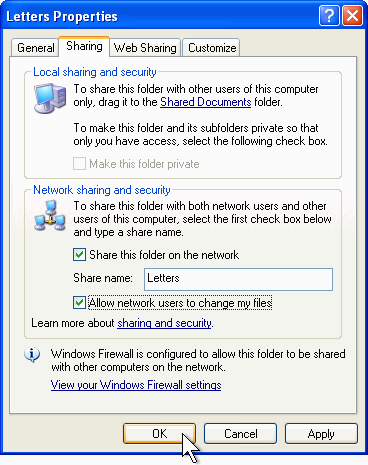
6. Click OK.
Windows Explorer will show a hand holding the folder icon, indicating that the folder is now shared.
Once the folders are shared, open the individual application folders and mark all files and folders read-only, with the exception of the <LMS> folder. Then share the LMS folder allowing all users read/write access.
When this is done, simply browse to the shared folders from the 'client' computers and find the application executable file. Then drag a shortcut from it to the Desktop (or the location of your choice).Note: By default, only you and other people with an administrator account on the computer sharing the folder will be able to open your files. To limit access of specific users with an administrator account on the computer sharing the folder.
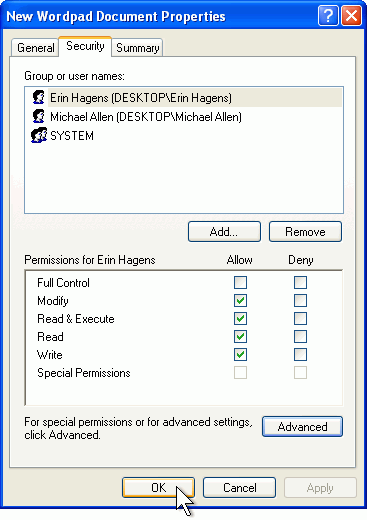
Setting Permissions
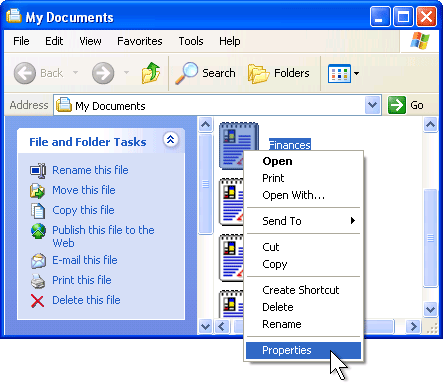
1. Select the folder or files you want to set permissions for. To select multiple files and folders, hold down the CTRL key on your keyboard and click each file.
Right-click the selected folders and files, and then click Properties.
2. Set Permissions for the files or folders.
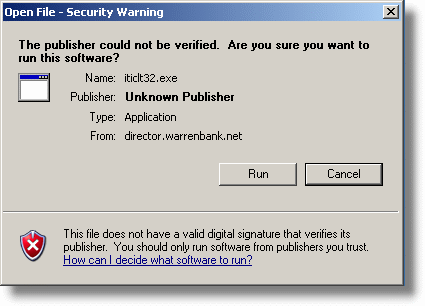
If the shortcut says "Publisher cannot be verified"
When service pack 2 came out for Windows XP the following message popped up when trying to launch applications from the desktop:
It is the result of Microsoft trying to protect users from malicious programs. The message will appear for any shortcut or executable that is hosted on a network share.
There are two ways to solve this problem. First you could disable the feature totally. If you open the local policy editor by running gpedit.msc at the run window. Dig down to: User Configuration\Administrative Templates\Windows Components\Attachment Manager\Inclusion List For Low File Types
Enable it, and add .exe to the list
There is a big security issue with this. Internet Explorer uses these same settings. By changing it you are keeping IE from warning users about running EXE files. It is unfortunate that Microsoft decided to integrate the setting in this way.
The next way is the preferred way.
First, determine what server the shortcut is hosted on. For our example we will allow only shortcuts that are pointing to server1 to be launched without the warning.
Open Internet Explorer.
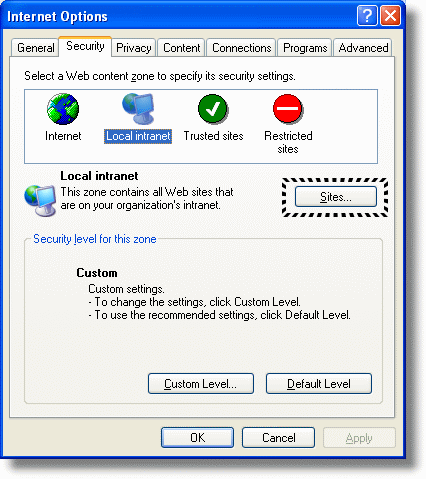
Click on tools, then Internet Options. Click on the security tab.
Once you are on this tab. Make sure you first click "Local Intranet", and then the "Sites" button should light up. Click it.
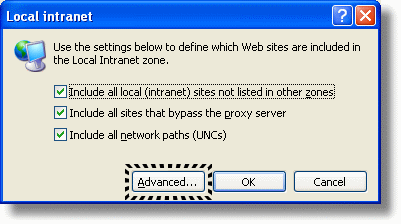
On the form that is displayed, click advanced.
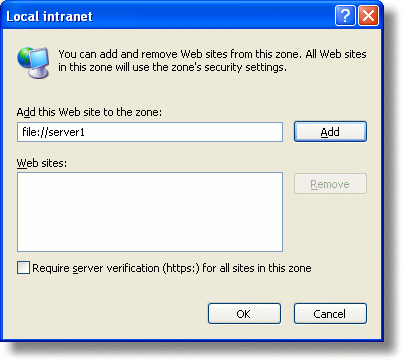
You will be shown a list of sites that are in the "Local Intranet"
To add your server to the list. Type file://server where 'server' is the name of your server. We will put server1 here
Click on Add.
Click OK, on the rest of the dialogs to get out of the settings for Internet Explorer.
Now we can create shortcuts that point to that server, and no "Publisher cannot be verified" dialogs will be shown.
If you have suggestions, please email support@koldwater.com